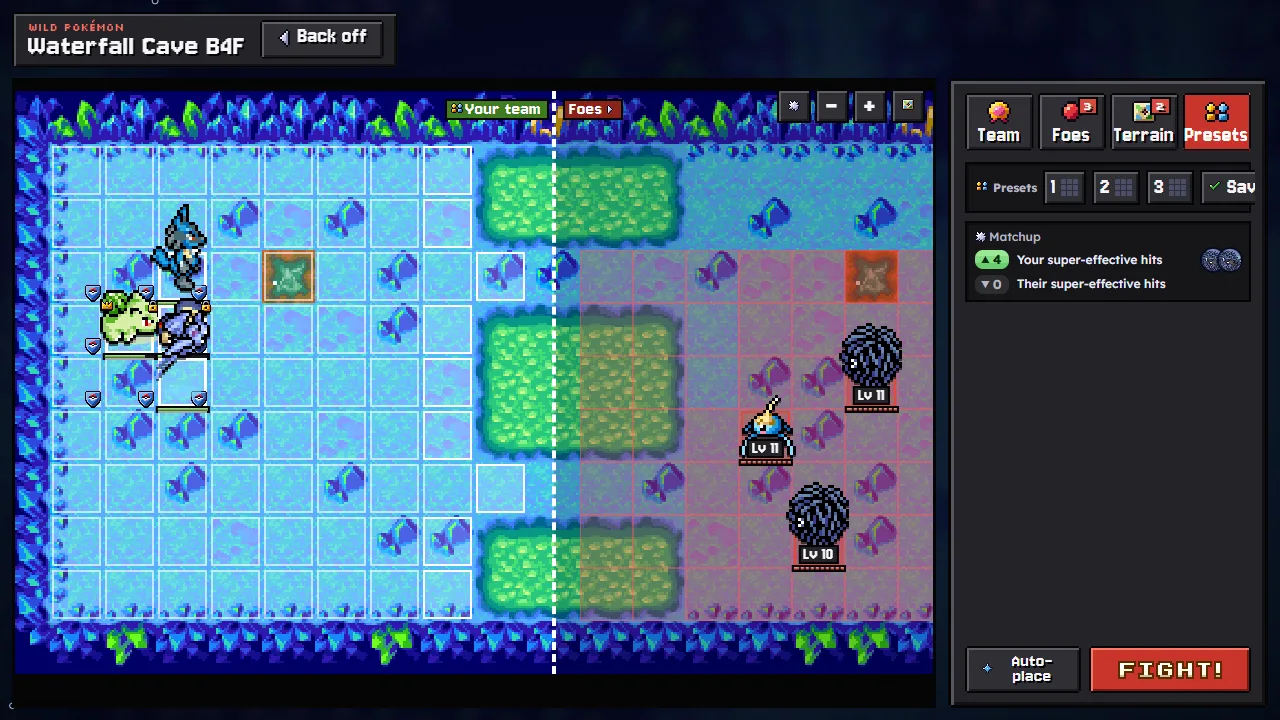
Before every fight on an expedition, the game stops on the deploy screen. It shows the arena the fight will happen in, from above, with the foes already standing where they will start. You place your team, give each member an item, and press Fight!. After that the fight plays by itself, so where everyone starts is one of your biggest choices.
The arena and its two halves
The arena is drawn in the dungeon's own tiles; the Terrain tab says what each kind of ground does (Fights). A dashed halfway line splits it. Your half is lit: every square of open ground on your side at least four steps from where the foes start, so no foe can walk up and hit you on the first turn (a long-range move still might). The foes stand on their half, washed red, in a formation of their own.
Big Pokémon fill more than one square: a Snorlax takes four.
Placing the team
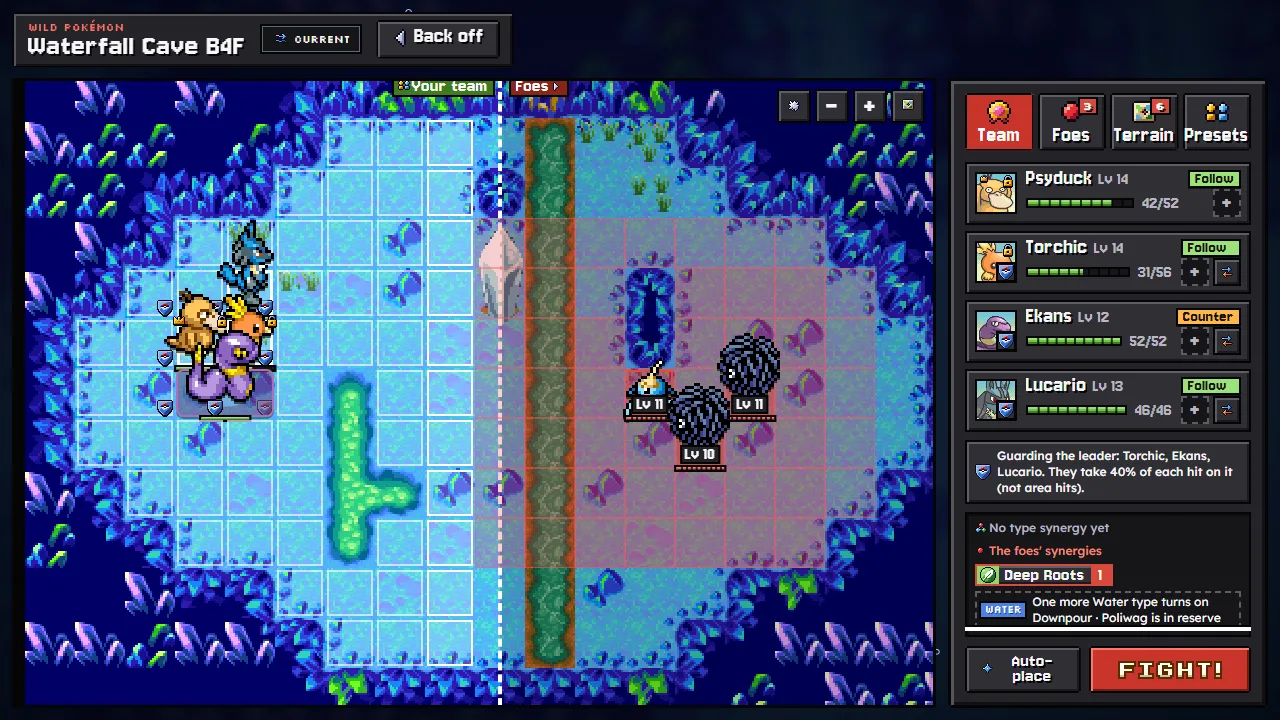
- Drag a Pokémon onto a square, or tap it and then a square. Drop it on another Pokémon, or tap two, to swap them. Everyone needs a square before the fight can start.
- Auto-place (or A) puts the leader behind the front with a guard by it, the sturdiest ahead of it and the ranged ones beside it.
- Presets load one of your three saved shapes (see the Formation below), fitted to this arena's half around the leader.
- Suggest appears on boss fights. It tries a couple of dozen placements on practice fights, never on this fight itself, and shows the best: Use it or Keep mine. Three a day; not for guest accounts.
The next fight starts in the line-up this one started in, fitted to its own arena.
The foes' reach
A red wash covers every tile the foes can hit on the first turn, and a square in reach gets a red "!" (R hides it). If a foe has a move that hits the whole room, the screen says so. Keep the leader out of the red: if the leader falls, the fight is lost.
Scouting the foes
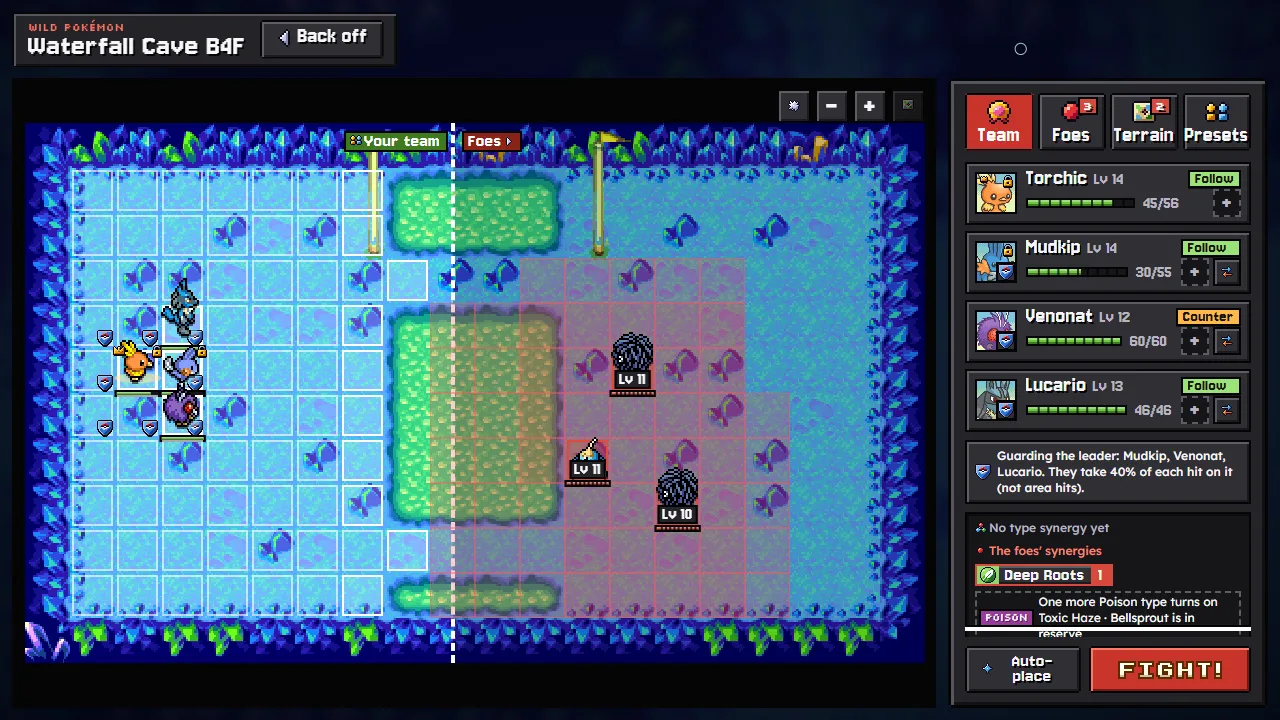
Tap a foe for its scouting card: its types, weaknesses and resistances, HP, ability, held item, the ground it can cross, and its moves. A move your team has not seen used yet shows as "?", unless you have owned one of that kind.
The side panel also shows the matchup (how many super-effective hits each side has on the other) and the synergies one member away (Type synergies).
An item for the fight
Each member can carry one item from the bag into the fight: a berry, a seed, an orb or something to throw. The AI uses it once, when it helps most, and it is used up only if it is used.
| Item | When it is used |
|---|---|
| Oran Berry, Sitrus Berry | Eaten when its HP drops to a third or less |
| Heal Seed, the status berries | Eaten when a status problem stops it |
| Leppa Berry | Eaten when one of its moves runs out of PP |
| Quick Seed, Violent Seed | Eaten when a boss or a pack comes close |
| Blast Seed, Stun Seed, Iron Thorn | Thrown at a foe: seeds at one in front or a strong one, spikes before it comes close |
| Slumber Orb and the other foe orbs | Used when two or more foes (or a boss) come close |
| Sunny Orb and the other team orbs | Used for the team as the fight begins |
A ★3 Pokémon carries a second item. In a dungeon with no items allowed, only what the team found or bought on the way can go in.
Swapping in the bench
Every card but the leader's has a swap: a Pokémon from the bench comes in on that square. The one going out waits on the bench. One that has fainted rests for the rest of the run.
Quick fights
With Settings → Speed → Quick fights on, ordinary wild packs skip this screen and the fight starts from your formation. Elite packs, Monster Houses and bosses still stop here.
The Formation
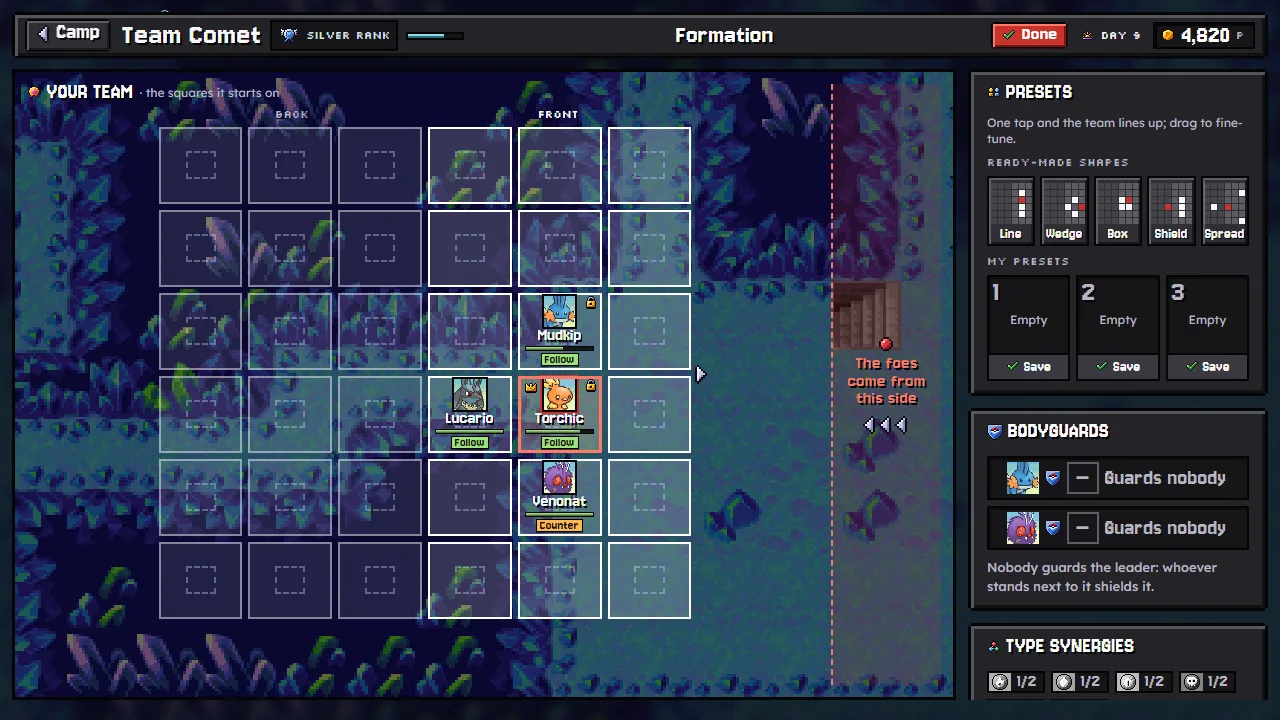
The Formation screen, from the camp's party, the Team page or the gate, sets the shape the next fight starts in, on the team's half of its arena.
The board has six columns by six rows; the three on the right are the front, lit, facing the foes. The front meets the foes first; the back is safest, for shooters and healers. Each member shows its tactic on its square (T changes it).
Ready-made shapes line the team up in one tap, with Undo for a few seconds:
| Shape | What it does |
|---|---|
| Line | Side by side along the front |
| Wedge | A point aimed at the foes, the leader at its tip |
| Box | Two by two, close together |
| Shield | The leader at the back, behind a wall of three |
| Spread | Far apart, so moves that hit an area catch fewer |
Presets: save three shapes of your own (the keys 1 to 3 load them). A preset keeps where each member stands around the leader, and its bodyguards, so it fits any arena.
Bodyguards
On the Formation's Bodyguards panel or the Team page, every member but the leader can be given one friend to guard, and that friend can be the leader. Each friend has one guard.
A bodyguard stays by its friend, steps in front of its biggest threat and takes 40% of each hit on it from up close; its own Defense and types decide how much that hurts. The leader's own guard takes 40% of each hit on the leader, up close or from afar. When the leader has no guard of its own, whoever stands next to it shields it: those squares carry a shield on the deploy screen.
On the arena a line in the pair's colour links them. Every fight they stand in together builds their bond:
| Bond | Fights together | Opens |
|---|---|---|
| 1 | 3 | Strikes back after a hit it takes for its friend |
| 2 | 8 | Holds on at 1 HP once a fight while guarding |
| 3 | 15 | Also takes ranged and area hits (the leader's guard: also area hits) |